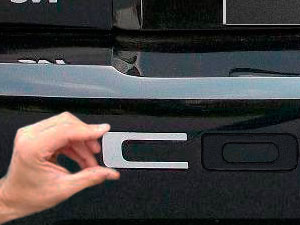
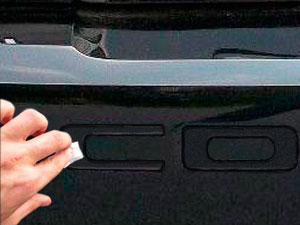
Step 1: Thoroughly clean the area where the pieces are to be applied with a clean, lint-free cloth and the alcohol swabs provided or with 3M Solvent 70*, to remove ALL residue and dirt.

A test can be performed for cleanliness with ordinary masking tape, if the tape sticks easily to the surface, if not repeat the cleaning process.

Step 2: Without removing the red backing tape, ‘dry-fit’ ALL pieces, noting correct placement, joins and angles.

Very Important Note: ALL pieces should be checked “dry-fit” before proceeding to Step 3. Immediately stop installation procedure and contact us even if one piece doesn’t fit.

Any money back or refund requests based on fitting issues will be declined once the kit or partial pieces are installed. Only replacement and correction requests will be reviewed and accepted.

Step 3: Gently heat the parts with a hairdryer or heat gun set to low. Keep the heat source at least 5″ away from the piece. Pieces will become flexible with application of heat.

Placing the pieces (backing tape side down) on the top of the dash with the front window defrost set to medium for 15 minutes, warms & keeps all pieces ready for installation.

Alternately, on sunny days, laying the kit in the sun for 10-15 mins will have the same effect.

Step 4: Hold the pieces by the edges to avoid touching the adhesive surface. Peel Red Protective tape out, place piece in position, align correctly and thoroughly press down on the entire surface of each piece to ensure a complete ‘wet-out’ of adhesion to the surface. Repeat this step for all pieces you have. When red backing tape removed DO NOT TOUCH 3M adhesive surface!

Step 5: Enjoy our product.